How to get Personalised Access Token from Github (PAT)
Steps 1: Open GitHub and click on your profile icon in the top-right corner.
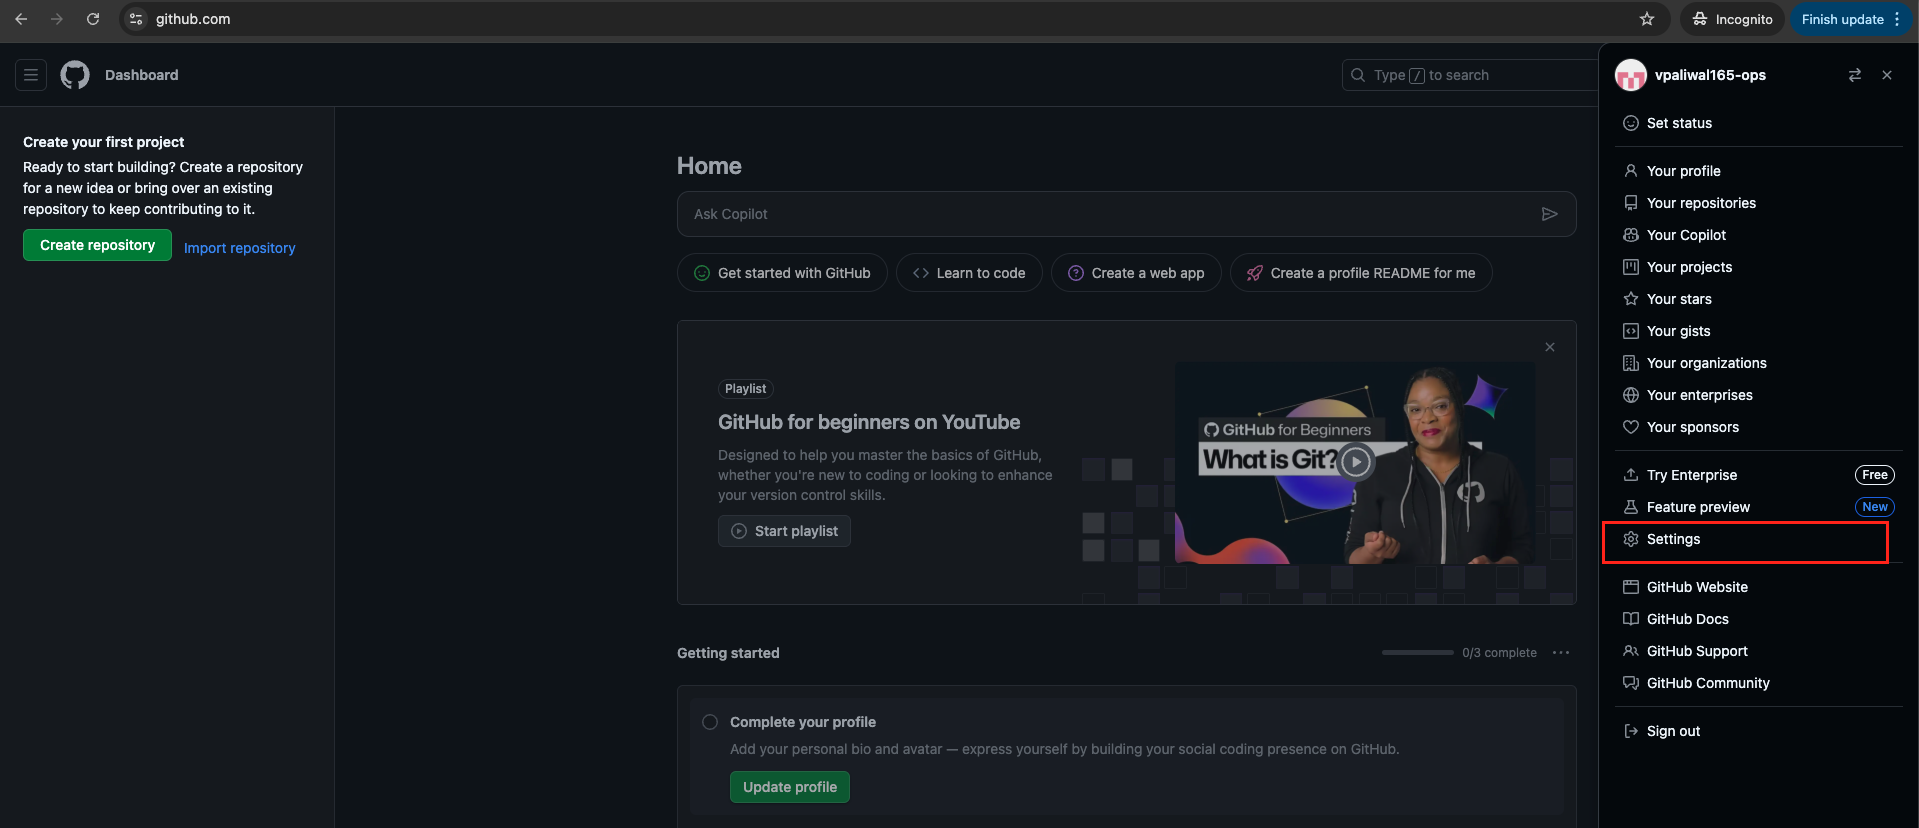
Step 2: Click on the “Settings” option from your GitHub profile menu.
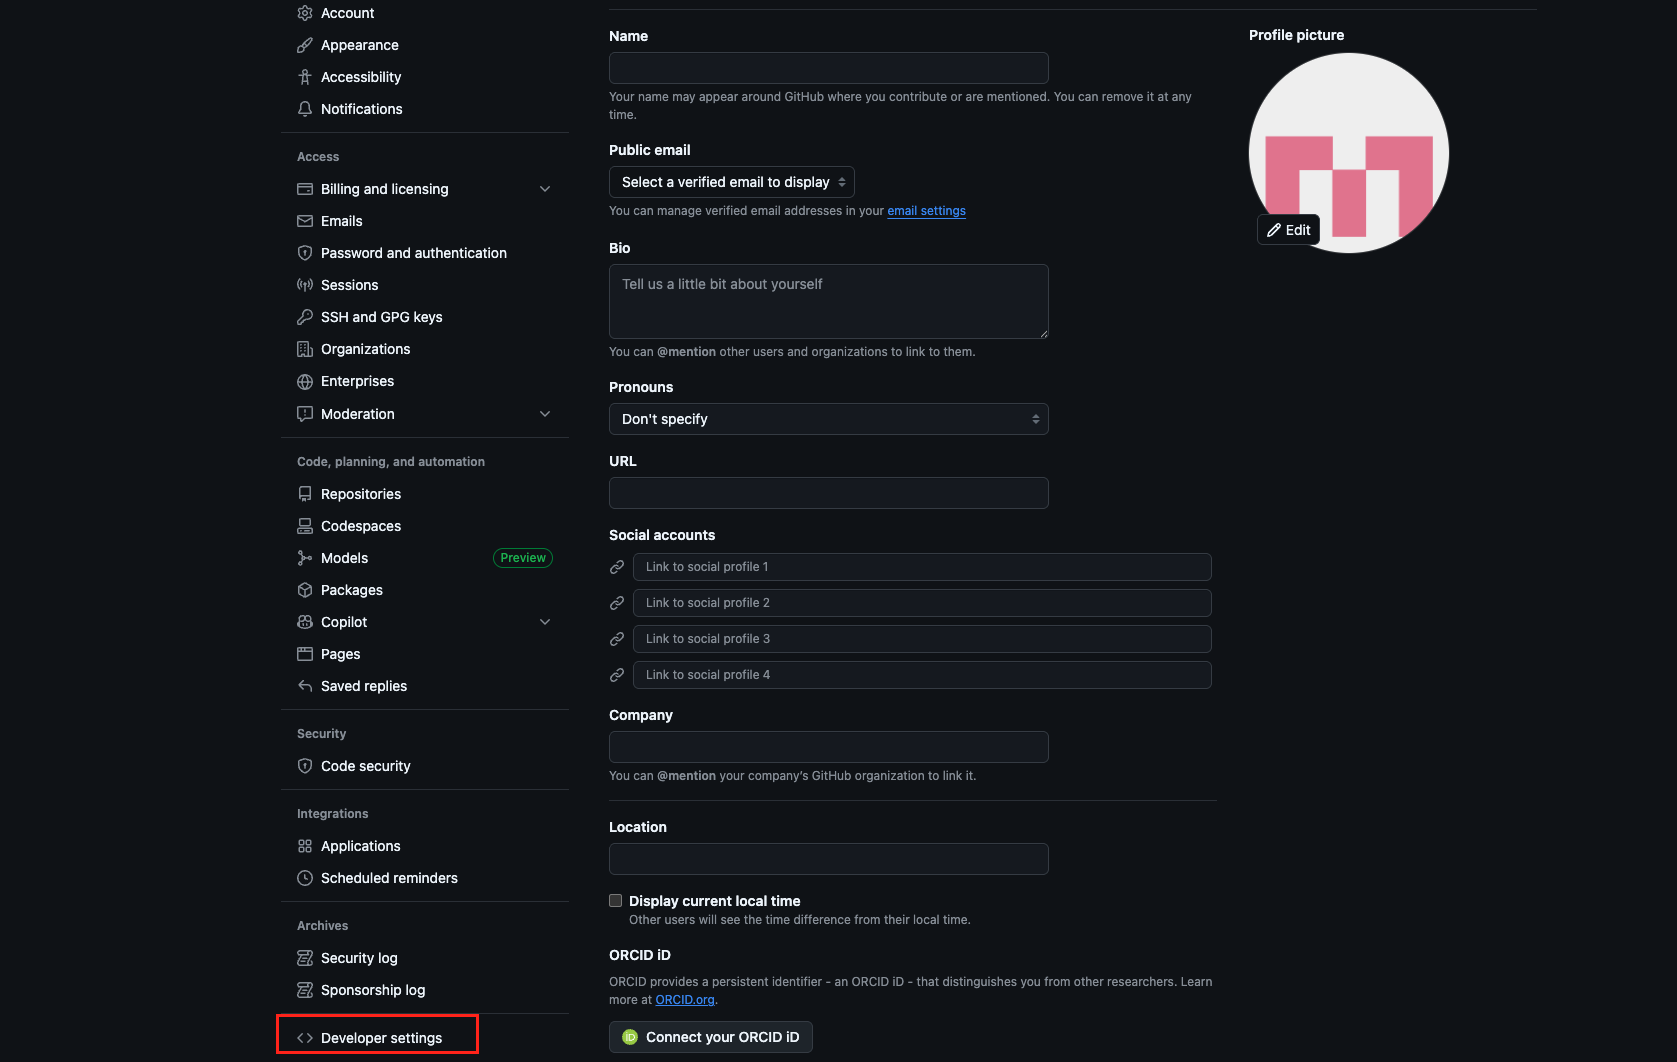
Step 3: Scroll down to the bottom of the left sidebar and select “Developer settings.”
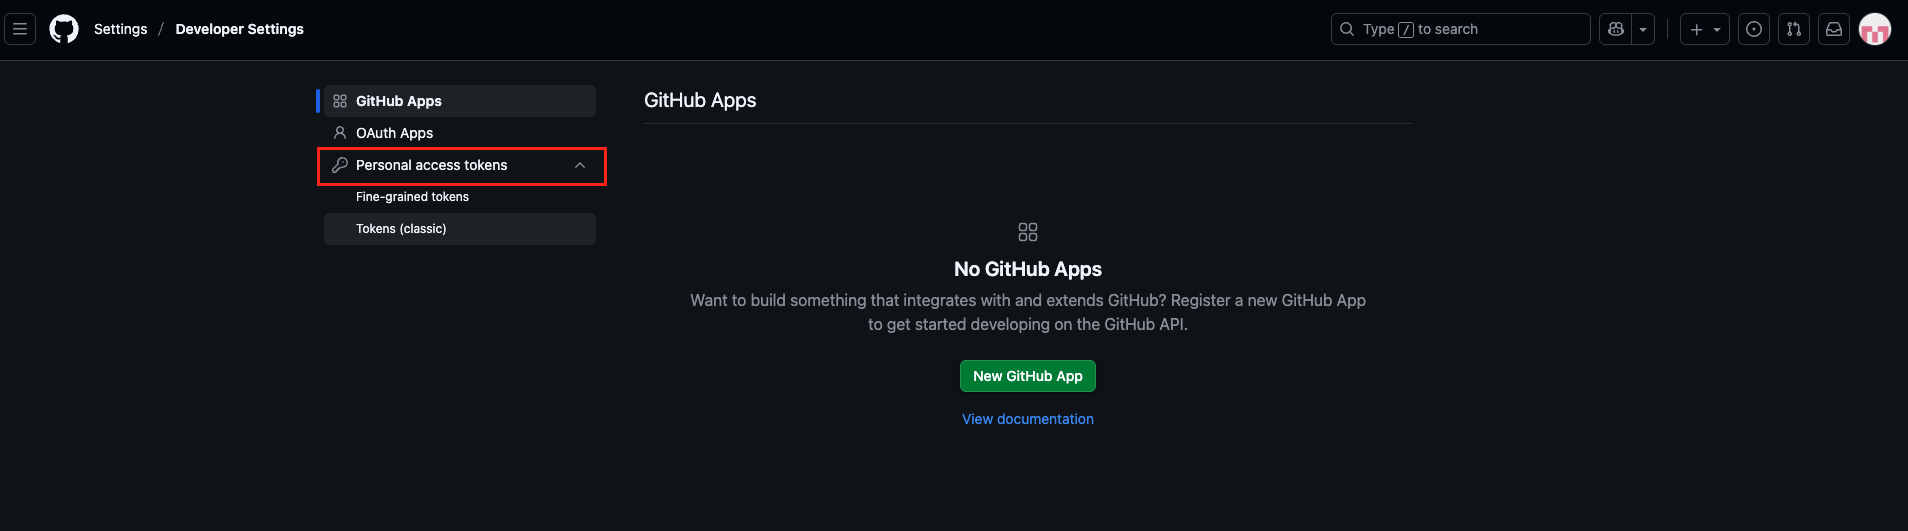
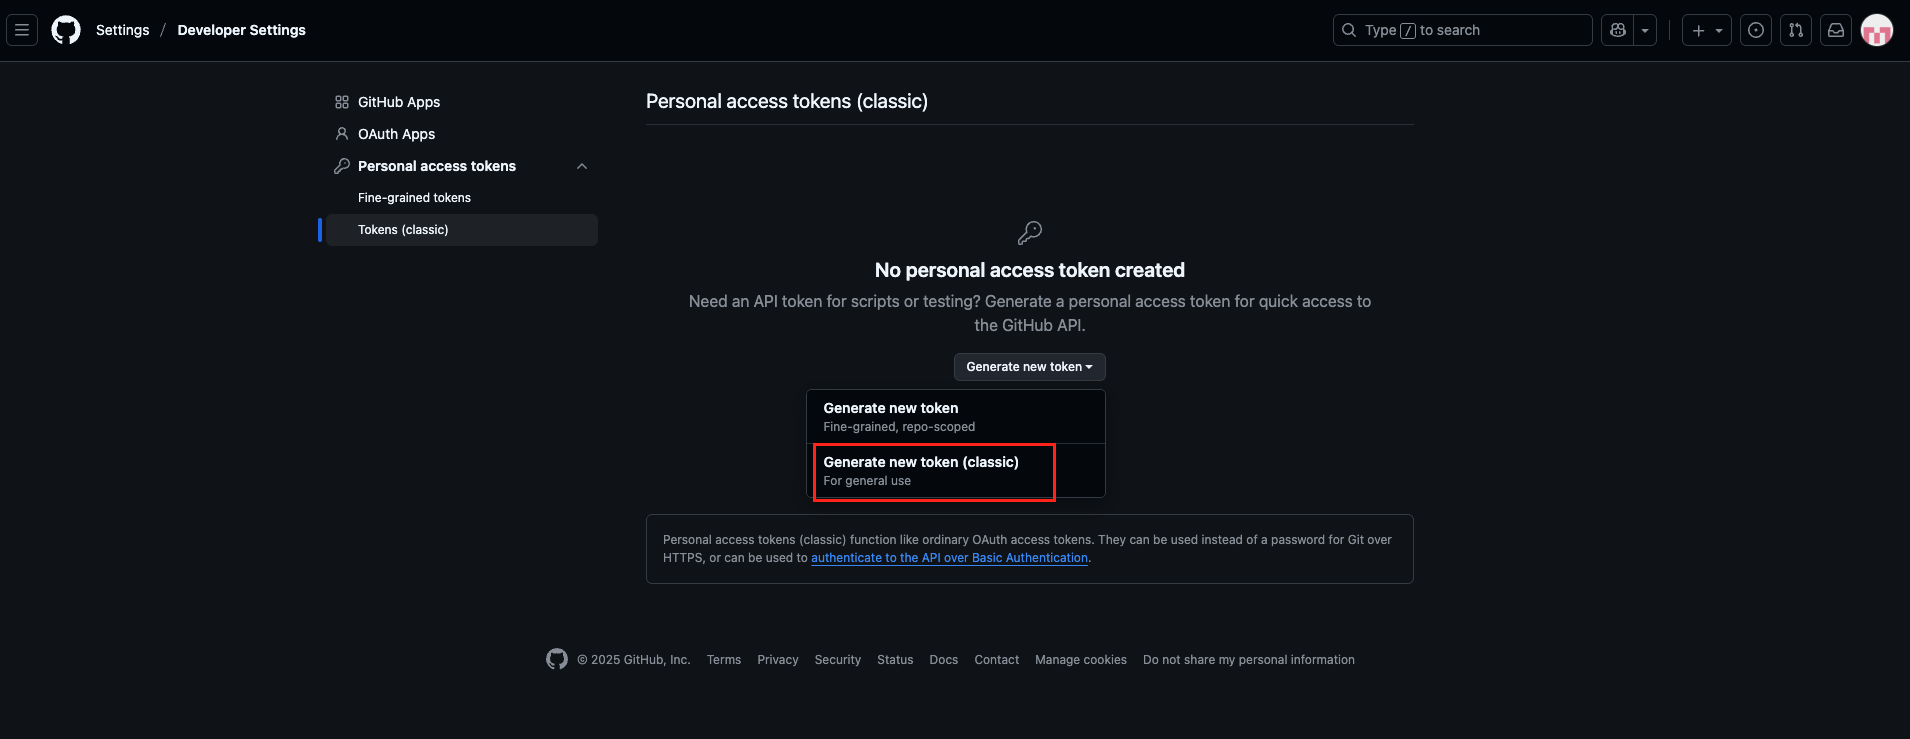
Step 4: In the Developer settings tab, click on Personal access tokens, and from the dropdown, select “Tokens (classic).”
Step 5: From the “Generate new token” dropdown, select the “Generate new token (classic)” option.
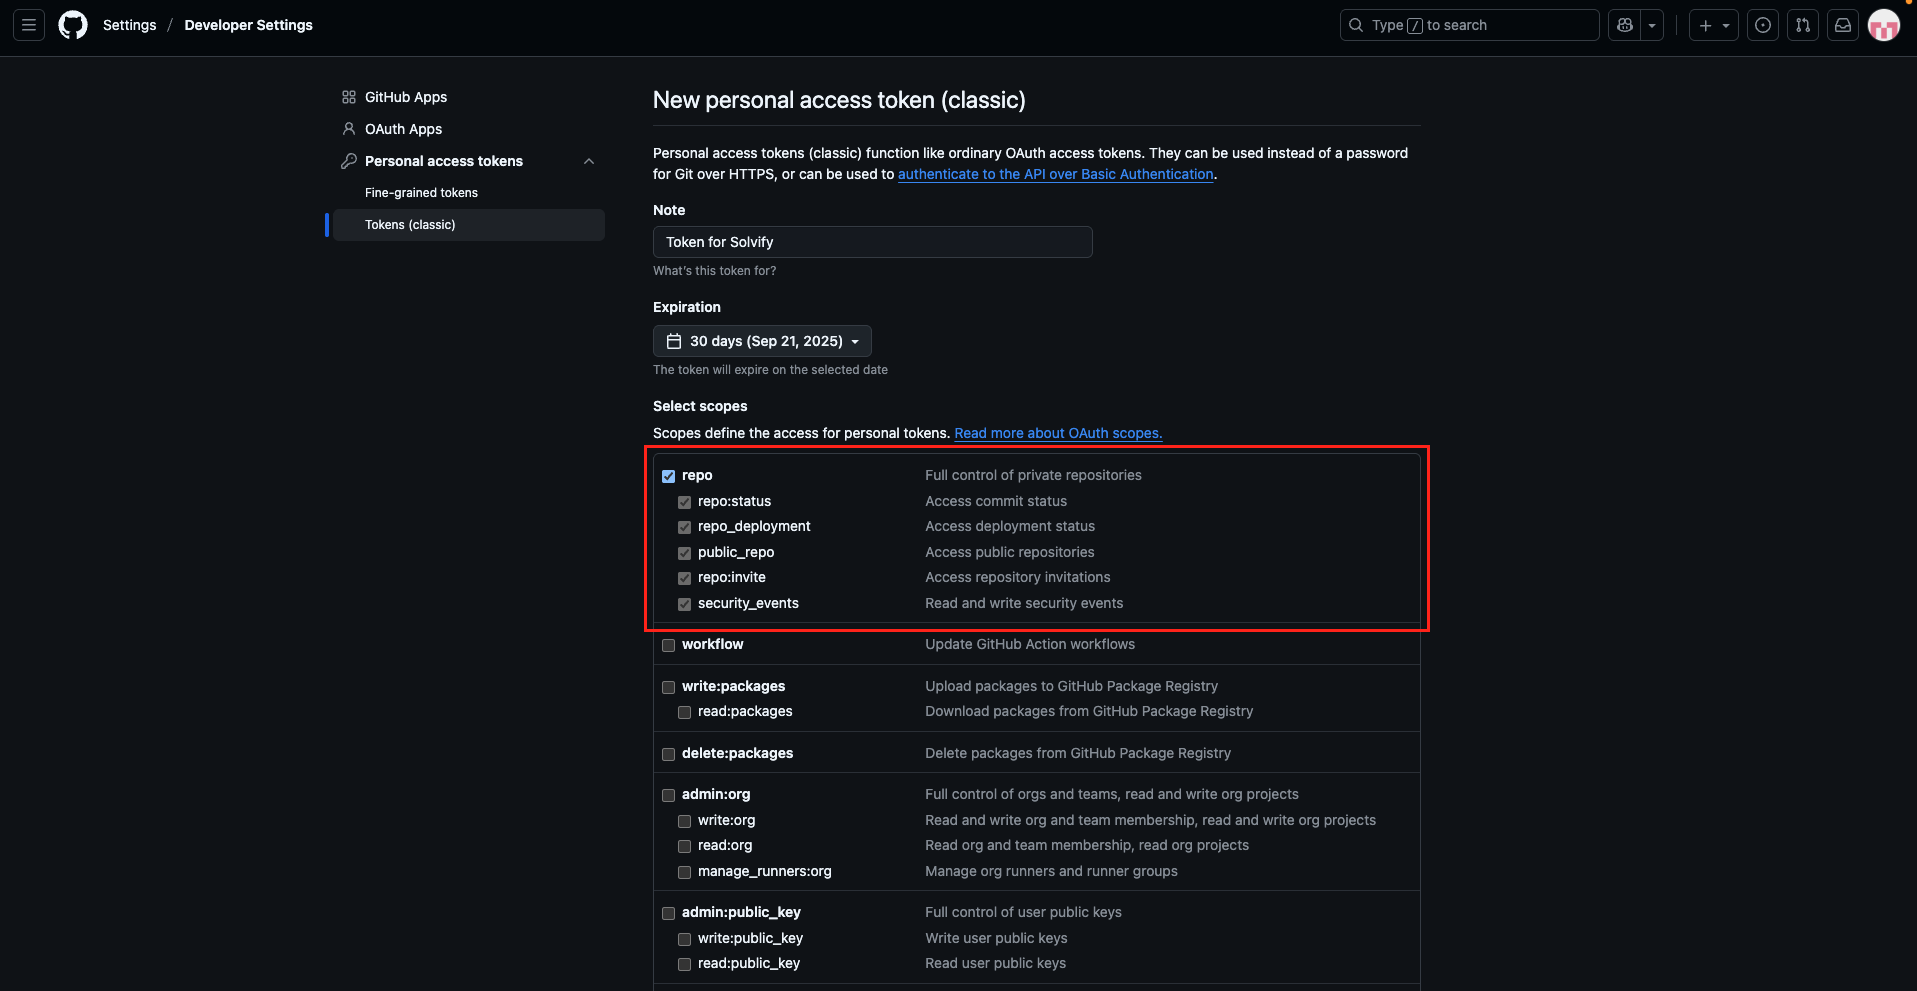
Step 6: Set the Expiration to “No Expiration” so that your Personal Access Token (PAT) remains valid indefinitely. If the token expires, Solvify won’t be able to fetch your project code, and your projects will no longer be visible to clients for purchase.
You may also set a custom expiration date. In that case, your projects will remain available until the token expires. Once expired, clients won’t be able to view or purchase them, but you can update the PAT token from your console. However, it’s recommended to choose “No Expiration” to avoid interruptions.

Step 7: Select the required scopes (permissions) as shown in the screenshot below, and then click the “Generate Token” button at the bottom of the page.
Step 8: After clicking the “Generate token” button, your token will be displayed only once. Make sure to copy it immediately and store it safely for future use.